9 AirPods Tips And Tricks That Apple Never Told You About
The AirPods are an incredibly popular product, a successful Apple initiative that forced the entire industry to fall in line. Experienced AirPods users have probably gone through various generations so far, and they might already be aware of every AirPods trick. But the following collection of tips should improve help to the AirPods experience for veterans and new owners alike.
AirPods tricks for any model

The AirPods arrived alongside the iPhone 7 as a solution for the missing headphone jack. They became best-selling devices and continue to sell just as well six years later. Since then, Apple has significantly expanded the AirPods lineup in an increasingly competitive market.
The regular model retails as AirPods (3rd generation). But Apple continues to stock the AirPods (2nd generation) for an even better price.
Then there's the AirPods Pro model that supports active noise cancelation (ANC) technology. And Apple is about to launch the AirPods Pro 2 alongside the iPhone 14 in a few weeks, according to rumors.
Finally, we have the AirPods Max wireless headphones. They're the most expensive AirPods model and support ANC like the Pro.
Despite the pricing differences, all AirPods models offer the same main functionalities and run on the same software. Digital Trends put together a list of tricks that also cover some of the Pro features that are limited to the high-end models.
This inspired us to create the following set of AirPods tricks that apply to all four models above in most of the cases. But there might be a few tricks that do not work across the board.
Pairing AirPods with your Apple devices
If you've just purchased a new pair of AirPods, you probably know how easy it is to connect them to the iPhone for the first time. Just open the box, and tap the Connect button that shows up on the screen. Just like that, you've paired the two devices.
But there's a hidden AirPods trick in here. As long as you're signed into your Apple ID while using the AirPods you've just set up, all your other devices will recognize them. You can use them on iPad and Macs that are also on the same Apple ID without going through the Bluetooth pairing process that wireless earphones require.
Set different touch controls for each of the two AirPods
We've told you that the basic tricks apply to all AirPods, but there is one caveat. The AirPods Max works differently when it comes to setting up touch controls. That's because they're not wireless earphones. And therefore, you can't touch each bud to control music playback or answer calls.
But AirPods and AirPods Pro will let you set up different touch commands for the left and right bud. You'll have to tap on the bud (regular AirPods) or the stem (AirPods Pro) to initiate commands.
To customize them, you have to open the case to go into settings. Then go to the Bluetooth menu in the Settings app, find the i icon next to the AirPods and tap it. Then you can select Left or Right to choose the bud you want to customize. You'll be able to set touch commands from the following menu for each bud.
As a general reminder, touch commands include invoking Siri, playing and pausing music, and skipping tracks. Double-tap either AirPod to answer calls.
- Bonus tip: You can invoke Siri by voice, don't waste a touch control for the assistant.
Let the AirPods detect your ear
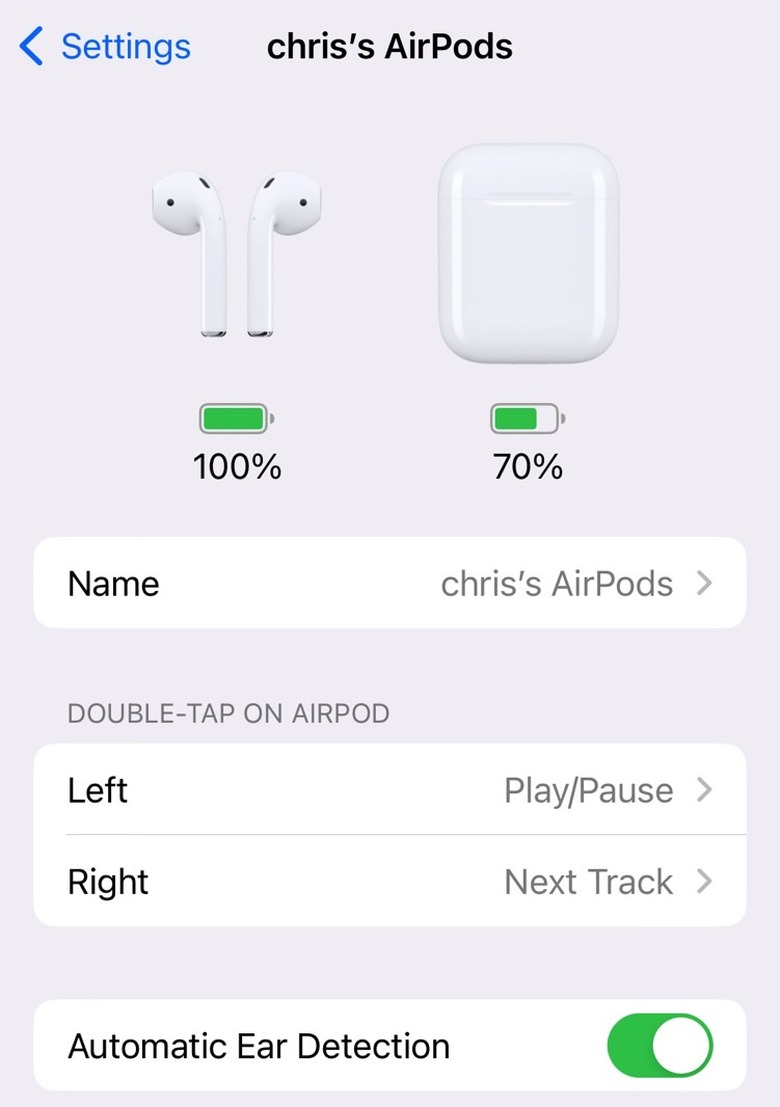
This AirPods trick is called Automatic Ear Detection, and it does what you think it does. As seen in the clip above, this AirPods setting is in the same Bluetooth menu for AirPods.
What Automatic Ear Detection does is automatically start playback when detecting the ear. That means that audio stop when you remove the AirPods from your ear. That's a neat feature to have enabled, especially if you don't put your AirPods in the case right when you take them out. That's because it'll save battery life by stopping playback.
Share audio with another pair of AirPods
You can connect more than one pair of AirPods to the same source. You might want to listen to the same music with a friend at the same time.
To do that, head to Control Center, tap the AirPlay button (the circle-like icon), then look for Share Audio, and then bring your friend's iPhone close. Your friend will have to tap Join on their device. And that's how you beam music to two sets of AirPods simultaneously.
Enable Spatial Audio
Spatial Audio is Apple's version of surround sound. It's available on various devices, including three AirPods models: the third-gen AirPods, the AirPods Pro, and the Max.
The feature tracks your head to adapt the sound in your ear so that you can experience surround sound. Spatial Audio is enabled by default, and you should leave it that way, especially for movies and TV shows.
Head to Settings, Music, and look for the Dolby Atmos setting. You'll want to have it on Always On.
- Bonus tip: You'll want to have Lossless Audio enabled in Apple Music, even though none of the existing AirPods models support Lossless audio.
Fix the music volume issues in Apple Music

While in the menu above, look for the Sound Check menu and turn it on. Just like that, you've fixed the volume issues in Apple Music. Different tracks can have separate default volume settings. If you don't enable Sound Check, you'll find yourself fiddling with the volume controls all day long.
This isn't as much an AirPods trick as it works with any headphones, wired or wireless. But it's something to keep in mind if you use Apple Music on iPhone and other Apple devices.
AirPods tricks that you need to learn: Live Listen
AirPods support a feature called Live Listen that can help enhance the audio experience for everyday activities. DigitalTrends explains one use for it: spying on people around you by leaving the iPhone or iPad in the room with other people while you use AirPods connected to the device.
But Live Listen is meant to improve your hearing by leveraging the microphones of your iPhone or iPad. That's the primary use for the feature. Head to Control Center in Settings and add the Hearing button to the list of Included Controls by tapping the + sign. To enable Live Listen, swipe down from the top right corner of the iPhone to bring up Control Center. Look for that Hearing button, and tap it.
- Bonus tip: If you upgrade to AirPods Pro, you can enable Conversation Boost to further improve your hearing experience while talking to people.
Remember the AirPods battery tricks
The AirPods have decent battery life, and the case has extra charges in it. But don't forget to recharge them from time to time.
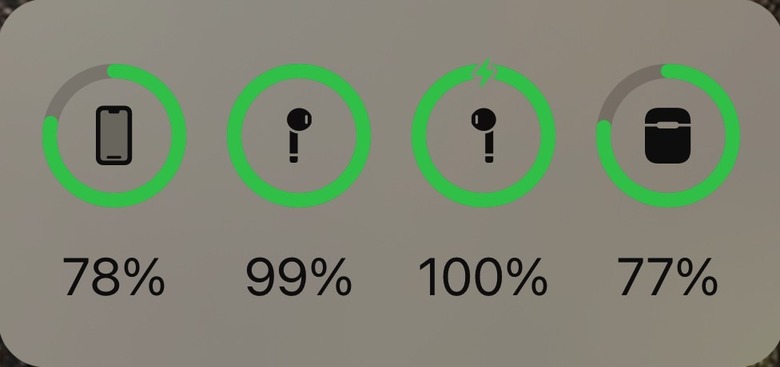
It's really easy to keep tabs on the AirPods battery. The best way to do it is by setting up a widget. Tap and hold on the iPhone screen until the icons start to jiggle. Look for the + symbol and tap it. Look for a Batteries widget, set up its appearance, and add it to the screen. It'll show the battery status of all your iPhone-connected devices and the iPhone itself.
But opening the AirPods case next to the iPhone will always bring up a menu on the screen that shows the battery life for the buds and the case.
Finally, the AirPods settings menu (inside the Bluetooth menu) will display battery life details for the earbuds and the case.
- Bonus tip 1: If you're using just one AirPod at a time to make calls, you can use just the microphone in one of them. Head to the same Bluetooth section of the iPhone's Settings app with the AirPods case open or while using them. Tap the i and look for the Microphone menu. Select which microphones to have active according to your needs. This can help reduce battery consumption on the AirPod whose microphone you're not using.
- Bonus tip 2: Remember to enable Automatic Ear Detection. It'll stop playback automatically when you remove the buds from your ear. This will also conserve battery life.
More AirPods coverage: For more AirPods news, visit our AirPods Pro 2 guide.