YouTuber Turns iMac Into DIY Apple Studio Display For Half The Price
When Apple launched the Mac Studio and Studio Display, it discontinued the 27-inch 5K iMac. However, a YouTuber named Luke Miani has taken one of those discontinued 27-inch iMacs and turned it into a DIY Apple Studio Display that cost him half the price of Apple's new monitor.
This YouTuber made a DIY Apple Studio Display
At $1,600, the Apple Studio Display is anything but cheap. Of course, as one of Apple's primary Mac accessories, not many expected it to be. Still, for that price, the 5K monitor that Apple launched to pair with the Mac Studio isn't easy to justify. Especially when you start looking at some of the other monitor options out there. Maybe that's why YouTuber Luke Miani decided to make a DIY Apple Studio Display.
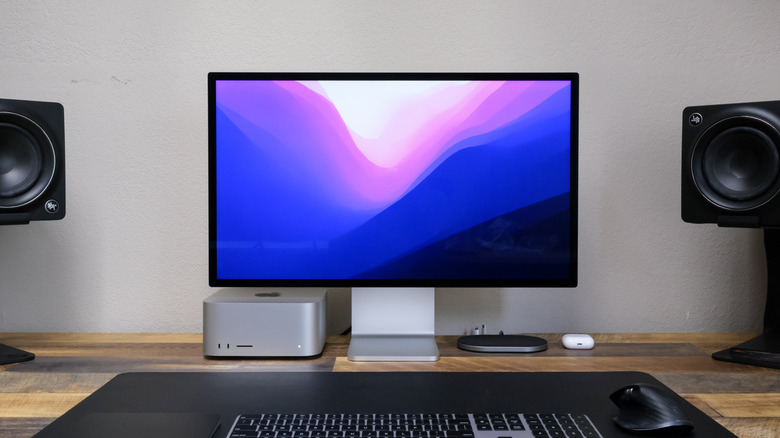
Instead of settling for the new monitor and its expensive price tag, Miani purchased a 2014 27-inch 5K iMac. He was able to purchase the iMac for just $620, Miani says in the video.
Instead of using Sidecar, a feature that lets you use your iPad as a second monitor on Mac, or Apple's "target display mode", Miani simply stripped the iMac of its components. This left the former Apple all-in-one as nothing more than a 5K monitor. Which is exactly what Miani wanted.
From there, Miani says he purchased an HDMI adapter and a conversion board that worked with 5K. He says that the latter was difficult, but it was a crucial step in bringing his DIY Apple Studio Display to life. Luckily, he was able to find one on eBay for around $179.
The board he purchased included two HDMI ports with support for 4K, and two DisplayPort 1.4 ports that support 5K. He said he also spent around $12 on a USB-C-to-DisplayPort cable.
Turning an iMac into a 5K monitor
Then it was time to connect everything up. To make his DIY Apple Studio Display, Miani says he wired up the LED driver with the LVDS connection. From there, he had to tape it up on the back of the panel and connect the USB-C to DisplayPort 1.4 cable. He also needed to connect the 12-volt power supply.
After that was done, he ran the cables through the base of the case via the RAM access door.
Miani says he also removed the original webcam that came in the 2014 iMac and replaced it with a USB camera meant for something like a Raspberry Pi or Arduino. That cost him around $30, as well as a $9 USB-A-to-USB-C extension cable.
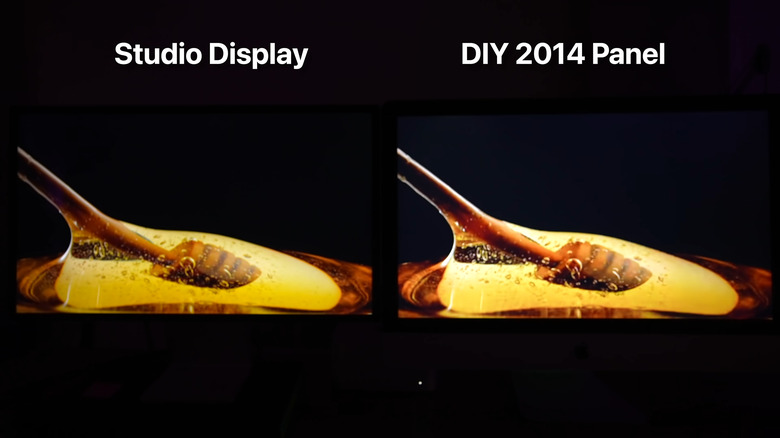
Overall, the attempt to create a DIY Apple Studio Display using an old iMac turned out really well. For the most part, everything looks exactly as you'd expect it to. The panels themselves are also very similar when compared side by side, though the DIY display doesn't support P3 color spaces.
Ultimately, the price came out to around $871, half the price of the Studio Display if you bought it brand new.
Looking for more Apple news? Check out our iPhone 14 hub for the latest info about the next iPhone.