How To Scan And Sign Documents On The iPhone
Despite the dominance of devices, paperwork is still a part of life, whether we like it or not. The iPhone is the only tool you need to scan documents and sign them quickly without requiring additional devices or assistance. These features might not be immediately clear to all iPhone users, but they're built into the phone, waiting to be discovered.
The hassle of signing a document
The pandemic has forced us to spend even more time on our devices while working and studying from home. But signing documents was a concern long before the pandemic.
Traditionally, you'd receive the document that you need to sign either digitally or in the mail. You'd then have to print the document, sign it, and mail it back. You would also have the option of sending over a scan or photo of the document.
The iPhone simplifies this process. You can scan any document with a few simple steps. And you can sign any document or photo just as easily. We've gone over these standalone iPhone features separately. But CNBC's latest coverage made us realize that iPhone users must know they can do both of these things simultaneously.
You can scan a document and then sign it. From there, you can print it or email the digital version to the third party requesting your response.
How to scan documents on the iPhone
The easiest way to "scan" a document with your iPhone is to take a picture. Apple added the scan feature to the Notes app in iOS 14, making the process even more convenient. We'll share two ways of scanning a document below.
Method 1: The really quick way
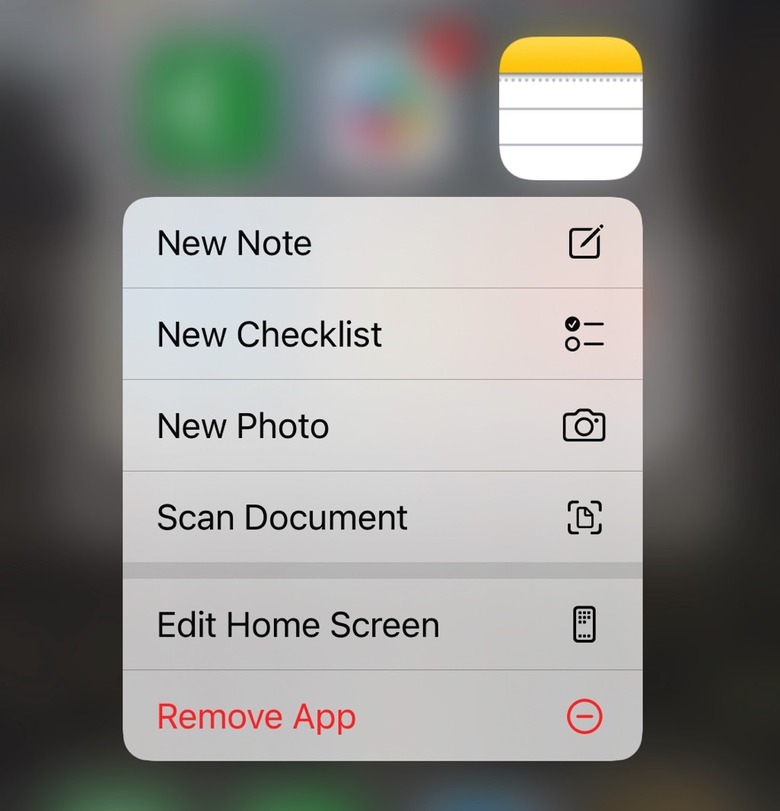
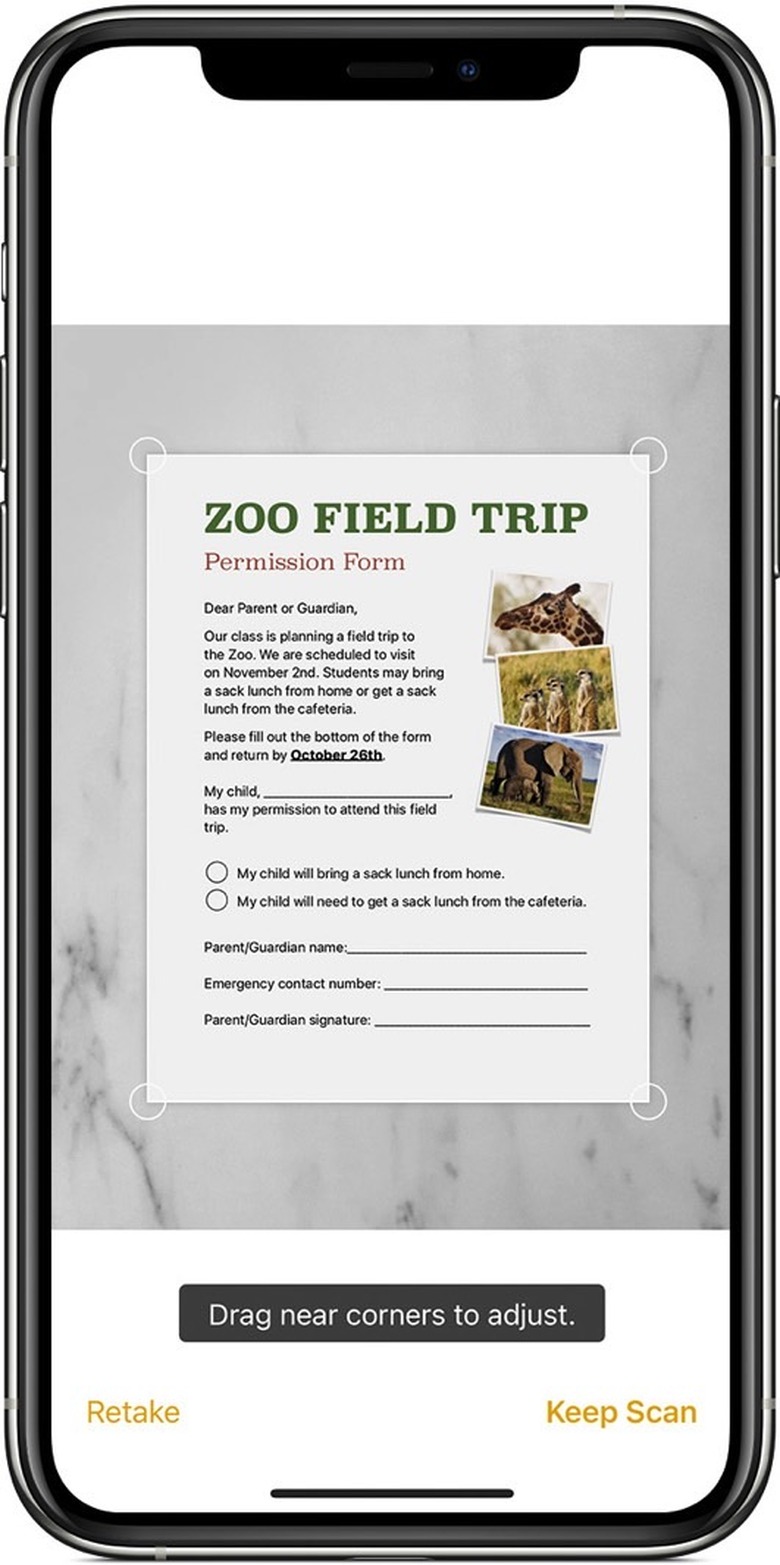
Find the Notes app on your iPhone. Tap and hold your finger on the icon until the menu comes up. Look for the Scan Document option and tap it. The iPhone will open the Notes app and move to the camera.
From there, follow the steps on the screen to position the document in view and snap a photo of each page. When you're done, press Save and the paper you've just scanned is now present in a new note inside the Notes app.
Method 2: The more useful way
Method 1 will always open a new note for your scans, and it's faster. However, if you want to add scans to a particular note, you'll want to use the following method.
You'll have to locate the Notes app again. But you'll want to tap the icon so the app loads. Then, find the note where you want to save the document you're about to scan. Tap on the screen where you want to insert it, and tap the Camera icon. This lets you insert files in the document, but you'll need to select the same Scan Documents option.
Like before, this will let you scan the document (or take the photo) of the paper inside Notes.
How to sign documents on the iPhone
Now that you scanned the document on your iPhone, you might want to sign it. Maybe that's why you scanned it in the first place, not just to have a digital record.
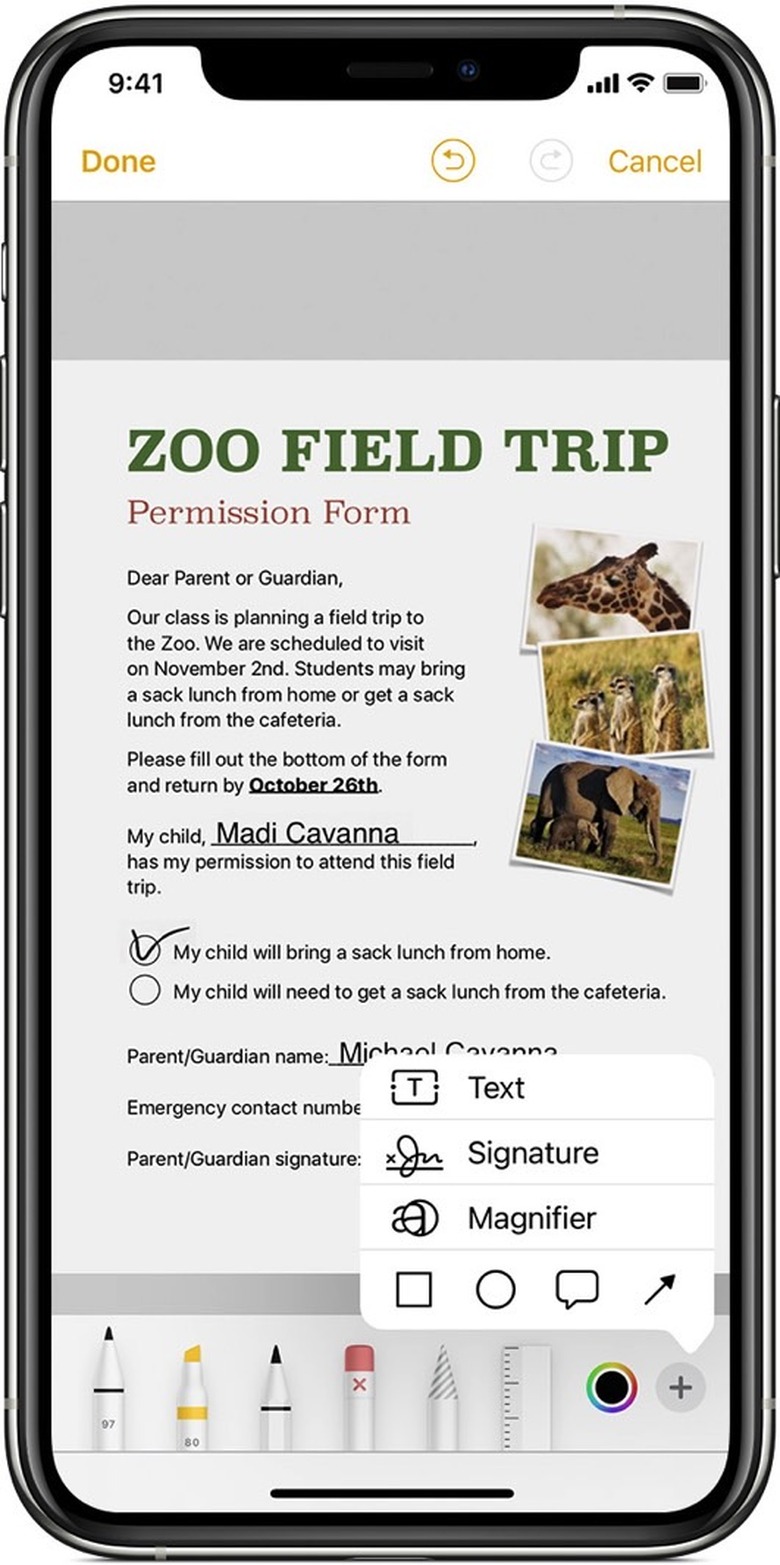
You can sign the document right after scanning it, so you don't have to leave the Notes app. Instead, tap the Share button, and look for the Markup menu.
After that, tap the + button to bring up a menu in the lower right corner. In it, you'll find the Signature option. It's the same feature you can use inside the Photos app.
- Bonus tip: For that matter, you could just take a regular photo of the document without bothering with Notes. And you could sign it inside the Photos app. The advantage of scanning the document in the Notes app is that you can quickly make it look like a properly scanned document. You can do the same thing in the Photos app, but the editing takes longer.
Once you've signed the paper, tap the Done option. You can now share the document with other people via instant messaging or email. And you can print it if you need a hard copy of it.
Just like that, you've signed and scanned the document using just the iPhone. The process is similar on iPad. And if you use a Mac, the documents you scanned on your iPhone will also appear in the Notes app. We've already taught you how to scan a document on the iPhone while starting from the Mac.
More Apple coverage: For more Apple news, visit our iPhone 14 guide.